WSBRF
WSBRF
₹6,500.00
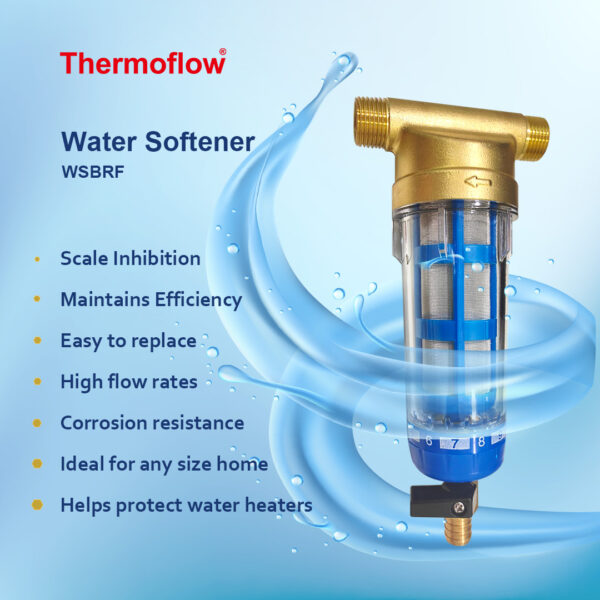
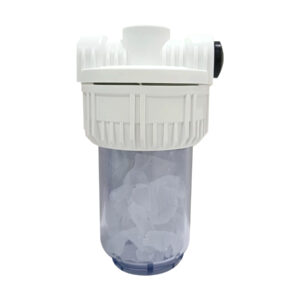
- Scale Inhibition
- Helps protect hot water heaters
- Maintains Efficiency
- Easy to replace
- High flow rates
- Corrosion resistance
- Ideal for any size home
I. Technical Specifications:
| Model | WSBRF |
| Material | Brass, food-grade stainless steel, AS |
| Flow rate | 3000-8000 Ltr/Hr |
| Applicable water | Municipal tap water |
| Frequency Pressure range | 1-20 bar |
| Applicable temperature | 2-45 C |
| Filtration accuracy | 40-60 microns |
| Connection size | Outlet 1/2″, Inner 1/2″ BSP |
I. Installation and Precautions
This water purifier is used for household pre-filtration, usually installed behind the household water inlet main valve or behind the water meter, as shown in the figure.

The following installation instructions use a PPR pipe connection as an example of installation, and additional adaptor connections are required. Please let professional installers prepare. If the domestic water pipe is a metal pipe, the connection needs to be equipped with a corresponding external elbow according to the actual situation.
1. Determine the installation position according to the product size (at least 20CM height is reserved for sewage) as shown in Figure 6.

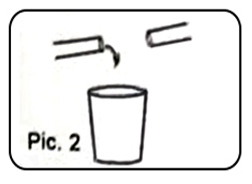
Close the water inlet valve, open the faucet in your home to drain water, and release the water pressure in the water pipe. Use PPR pipe scissors to cut a suitable distance at the installation position for installing the water purifier (the length of the pipe depends on the actual measurement), as shown in Figure 2, pay attention to the excess water in the pipe with a container.
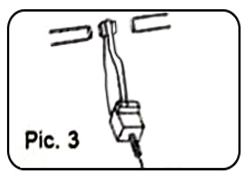
2. As shown in Figure 3, use the PPR pipe hot melter to connect one end of the cut PPR pipe, and weld the other end of the cut PPR pipe by the same method. Pay attention to the welding speed to ensure the welding quality. After cooling down for 2 minutes.
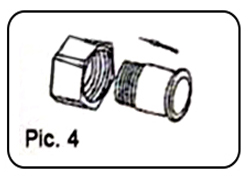
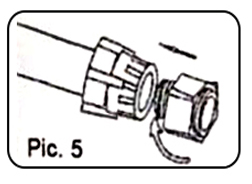
3. As shown in Figure 4, fully wrap the raw material tape on the external thread of the joint, and then tighten the wound joint assembly and the welded end of the hot melter. As shown in Figure 5, use the same method to process the other end.
4. Tighten the joints at both ends of the water purifier with a wrench. Note that the direction of the water flow should be the same as the direction of the water purifier, as shown in Figure 7.
5. Slowly open the water inlet valve, and turn off the water faucet after the household faucet can discharge water. Pay attention to check whether there are leaks or slow water seepage at the connection between the various parts of the water purifier. At the same time, you can open and close the drain valve multiple times Drain the water and observe it carefully. If leakage or water leakage is found, immediately check whether it is tightened (recommended observation time is more than 5 minutes).
II. Installation Precautions
1. The installer should check whether the parts are normal before installation.
2. This water purifier is not easy to install outdoors, and it should be as far away from ultraviolet rays, heat sources, fuel oil, and various chemicals as possible.
3. When wrapping the raw material tape, fully and evenly wrap it.
4. When tightening with a wrench, make sure that other parts do not rotate with it.
5. After installation, carefully observe whether there is leakage or water seepage.
III. Instructions
1. Simple rinse
After the installation is completed, open the water inlet valve, and the water filter starts to work normally. After the water purifier works for a period of time, the customer can clearly see the impurities filtered by the filter through the transparent cylinder. If the accumulated impurities affect the time of the water outlet and the pressure of the domestic water equipment, the filter of the water purifier can be cleaned. As shown in Figure A, with the drain valve open, turn the cleaning knob left and right to wash and discharge filtered impurities. (Note: first open the drain valve body, and then rotate the cleaning knob)
2. Cleaning impurities
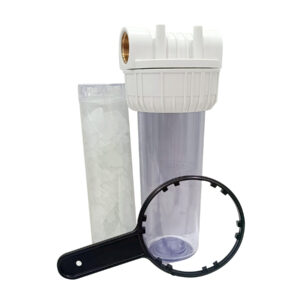
When the filter screen accumulates some sticky impurities, which cannot be cleaned by normal cleaning methods and affect the water output and pressure of domestic water equipment, as shown in Figure B Remove the transparent cylinder with a wrench and take out the filter assembly (see Figure C). You can use a cleaning solution or a brush to clean the impurities on the filter (Note: Do not use strong acid or alkali cleaning solution).
As shown in Figure E. Put the cleaned filter assembly back into the transparent cylinder assembly. Note: Insert the filter assembly into the two grooves on the cylinder (see Figure F). Tighten the copper parts with a wrench (see Figure G).

IV. Attention
1. This product is mainly used as a pre-filter for municipal water and drinking water (municipal tap water)
2. This product should not be installed outdoors or placed in direct sunlight to prevent freezing or water temperature greater than 45 °C
3. Install the product in a location that is easy to clean and maintain.
4. Avoid the following damage, such as collision, freezing, overheating, chemical contact, hammering, etc.
5. In the normal cleaning and maintenance process, pay attention to protect the integrity of each component.
IV. Fault solution
| Phenomenon | Cause |
| No water out |
|
| The outlet water flow is small |
|
| There is water seepage at the water purifier connector |
|




Reviews
There are no reviews yet.